Connecting NFS Shares on your Ubuntu Servers

Having a NAS comes with great advantages. It cannot only be used for storing personal files, like your precious documents, pictures and memes, but it can also be used to back up and store VMs and Docker data. On today's article, I am going to walk you through the process of attaching a network share on your Ubuntu server that can be used for storing your docker data.
When it comes to network shares, SMB and NFS are the common protocols utilized. SMB or SAMBA, stands for Server Message Block and it is widely adopted by Microsoft services to share access to files and printers. SMB is also utilized by Linux and macOS systems. On the other hand, NFS stands for Network File System and it is utilized on Linux systems. NFS is a distributed file system protocol utilized for file sharing. Both SMB and NFS can be pretty similar in function, however, they have some key differences.
SMB works in a server-client method. A user sends a request to a server and then receives a response allow authorization and access to the file share in question. NFS is a distributed access and when a user access the files in that server, it mimics a local access. The files gets the "local" access to the files while SMB adds the file sharing permissions which can be a different subset of access to the files and directories.
After explaining some differences, let's dive into configuring an NFS share and how to configure your Ubuntu server to access these.
How to setup an NFS share in TrueNAS Scale
Setting up an NFS share in TrueNAS scale is quite simple, let's get to it.
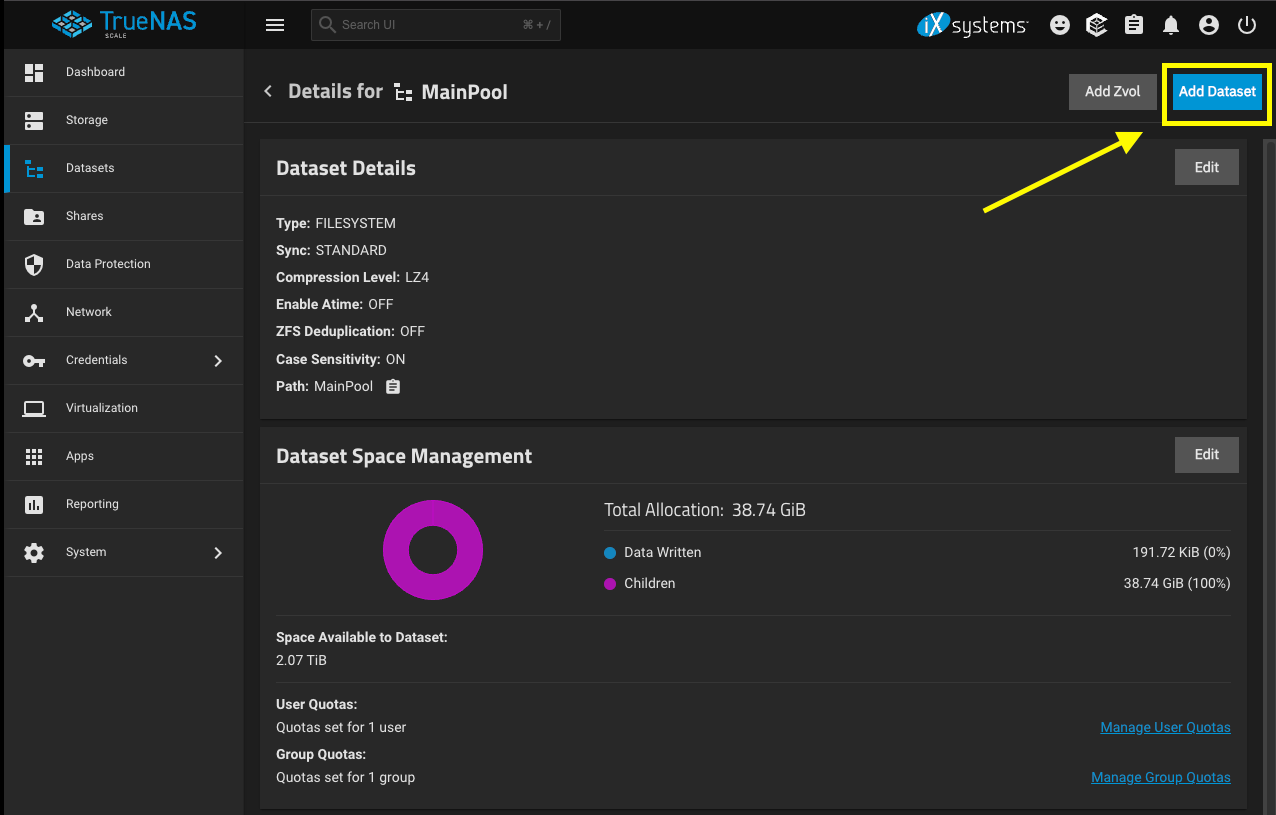
Assuming that you already have a pool created, we are going to navigate to the "Datasets" menu from the left panel. From there, click on the pool that you would like to host your share, note, you may see multiple pools depending how you have yours setup, then click on the "Add Dataset" button at the top right corner.
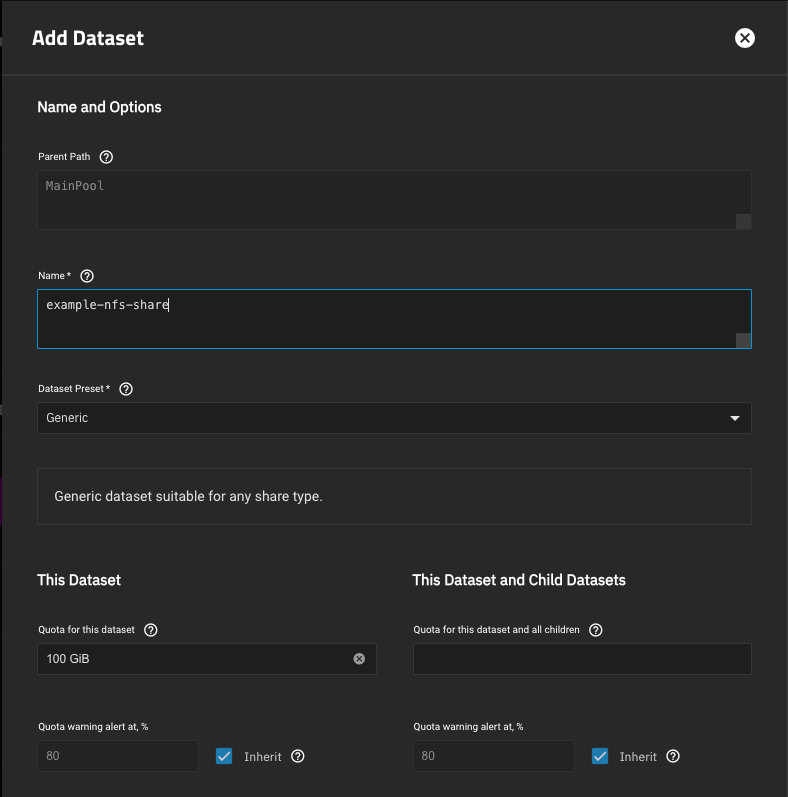
From here, you can give it a name, then set a Dataset preset. I personally leave this as "Generic" but you can set this to either SMB, Apps, or Multiprotocol. In addition to all these default settings, I like to give it a quota. Quota is a limit on the dataset that it cannot be surpassed with files. This can be helpful if you want to control how much data you want to allocate a dataset. You will see more settings that could be modified, but as mentioned, I am just sticking to the quota and a name for this share.
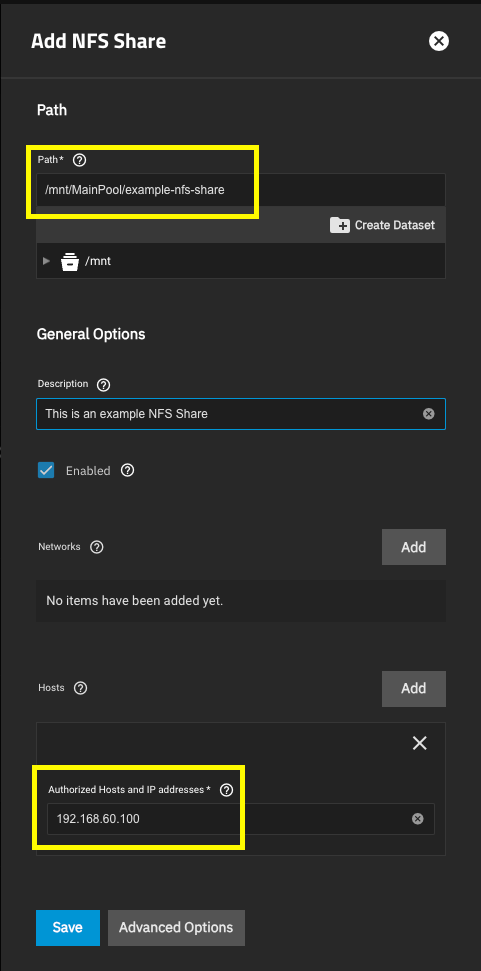
Once saved, you can click on create NFS share or navigate to the "Shares" menu from the left panel to create the share.
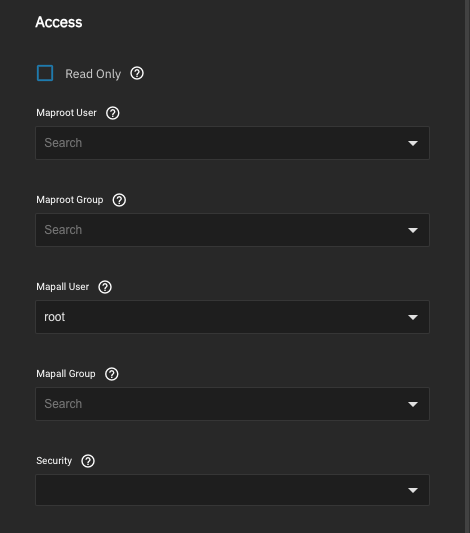
At the create the share screen, you can control the networks or hosts (devices) you want it to access. This can be crucial to maintain security. NFS is distributed, so any device accessing will have a general access that is assigned within the advanced options.
Since I am in a homelab environment, I have no problem giving the "Mapall User" the root user. This is not ideal in a real environment, and for this, you would create a user in TrueNAS then set it here to limit the access to other datasets. You may do this also for the "Mapall Group" and save your settings.
Steps to access the share on Ubuntu
Once you've created the share, we then move into adding the NFS share in Ubuntu.
For accessing the NFS share, there is a pre-requirement and that is to install nfs-common so let's run the following commands:
sudo apt update
sudo apt install nfs-common
sudo mkdir /mnt/<name-of-share>
This will update your repository and install nfs-common, which is needed to mount NFS shares on ubuntu. Additionally, this will also make a directory within the /mnt directory, which is used for mounting shares in Ubuntu.
After this, we can mount the share on the Ubuntu server by using the mount command.
sudo mount -t nfs 10.10.40.10:/mnt/MainPool/example-nfs-share /mnt/example-nfs-share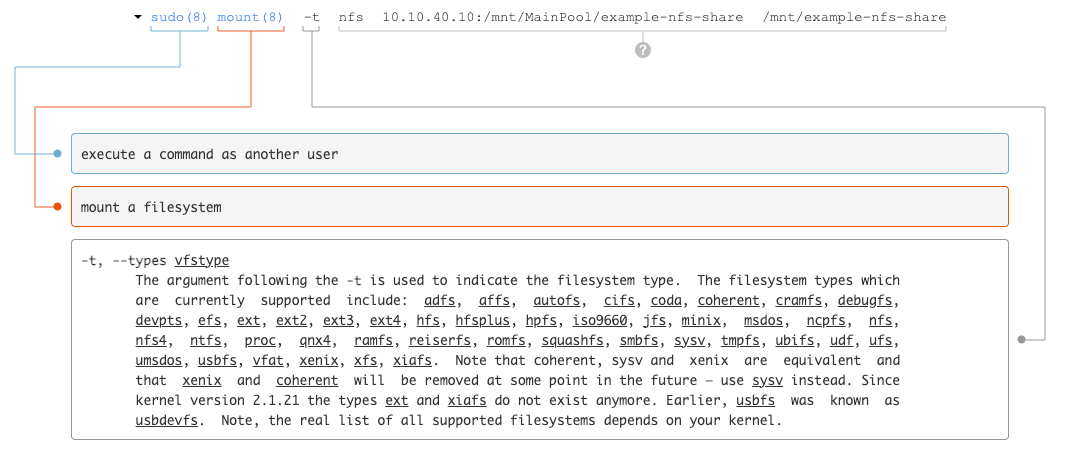
On this command, we are mounting as sudo user and setting the mount type as nfs. After this, we need to set the IP followed by colon and the directory on the NAS where the share is located, the other directory (separated by a space) is the local directory that we previously created.
After this, you can use this directory to store files within it. If you'd like to test this, you can use the touch command to create a file.
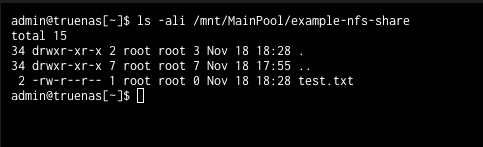
sudo touch /mnt/example-nfs-share/test.txtThen confirm that you can see this file in your TrueNAS.

On the TrueNAS, it would look like this:
How to permanently set these shares on Ubuntu
One disadvantage of using the mount example above is that the share wont stay persistent on your Ubuntu server. In order to mitigate this and ensure that your share stays mounted after reboots, we would need to modify the fstab file. So let's go over how this can be updated.
First we need to edit the /etc/fstab file by running the following command
sudo nano /etc/fstabScroll to the last line and add the following:
10.10.40.10:/mnt/MainPool/example-nfs-share /mnt/example-nfs-sahre nfs default,bg 0 0Now, I do not feel certain about how the fstab works at the moment but this is the setup that has worked for me. As far as I can tell, this is the breakdown I understand:
10.10.40.10:/mnt/MainPool/example-nfs-shareis the network share location/mnt/example-nfs-shareis the local mounting pointnfsis the mounting typedefaultrelates to permissionsbgmay relate to running in the background but it is also part of the options- The first
0is to check if the data should be dumped (meaning removed) - The second
0is to tell if it needs to be checked on boot
If I am incorrect about the fstab info, let's definitely connect on social and discuss! Check me out on Twitter at my social links!
Final remarks
NFS and SMB shares are widely used protocol for file sharing on multiple OS with its differences. One main advantage that I see of using NFS is that it can be used as a directory without having to over complicate file permissions and can be viewed as a directory on Ubuntu. I have shown you how you can utilize the tools at your disposal, that being TrueNAS and your Ubuntu servers to access those shares and how you can configure them on Ubuntu.